Excuse me for not being very active lately. It seems that the more I have to write about, the more overwhelmed and lazy I get. I haven’t finished writing about Iceland, last year I did most of the south of Norway and part of Sweden of the Trans Euro Trail, and I have been in Estonia recently.
In the south of Sweden a friend had an oil leak consequence of a fall, but he managed to fix it by fitting a piece of a Tetra Pak between two pieces of the cover of engine. I became aware of the importance of knowing how to fix your own bike, and I bought a Haynes manual to start doing maintenance and small repairs myself.
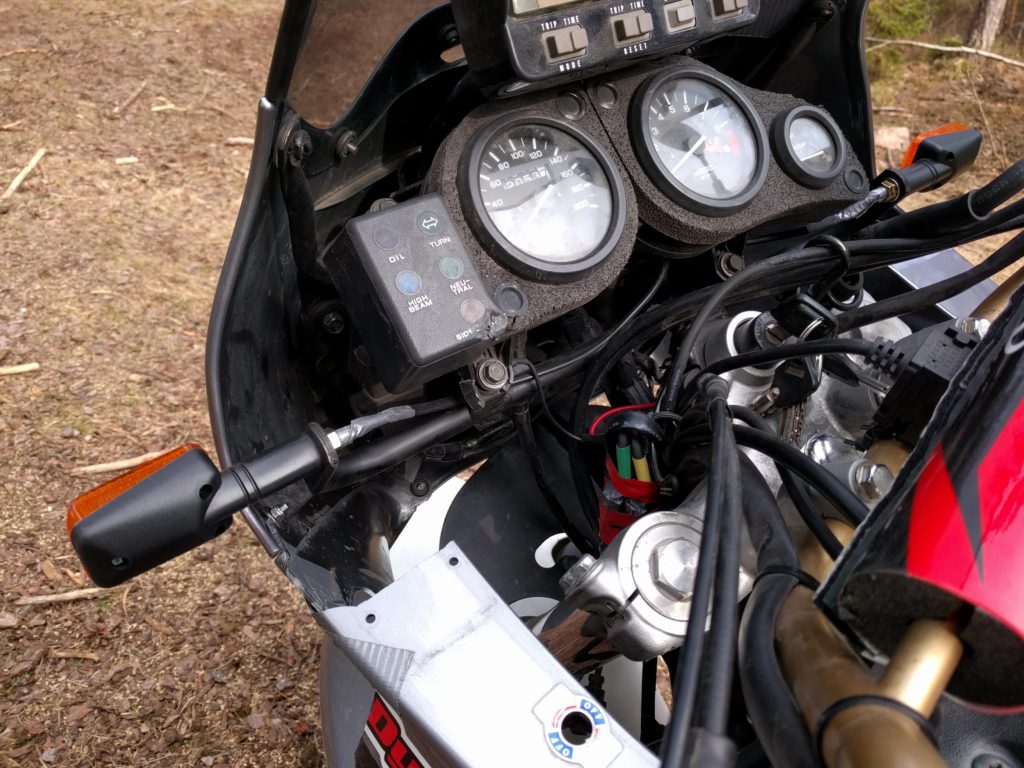
So last winter I decided to finally repair the main damage of my 2017 fall. The repair involved replacing the front bracket and I had an approximate budget of 700 € from my usual garage. Luckily I found here a refurbished bracket for 170 €, including shipment from Greece to Finland. In the picture below you can see a comparison of both brackets. The guys at my garage did their best to straighten the old one without disassembling it, but the headlights were not completely straight and the tripmaster was blocking the view of the top of the speedometer and tachometer. That’s why it was important to fix it.
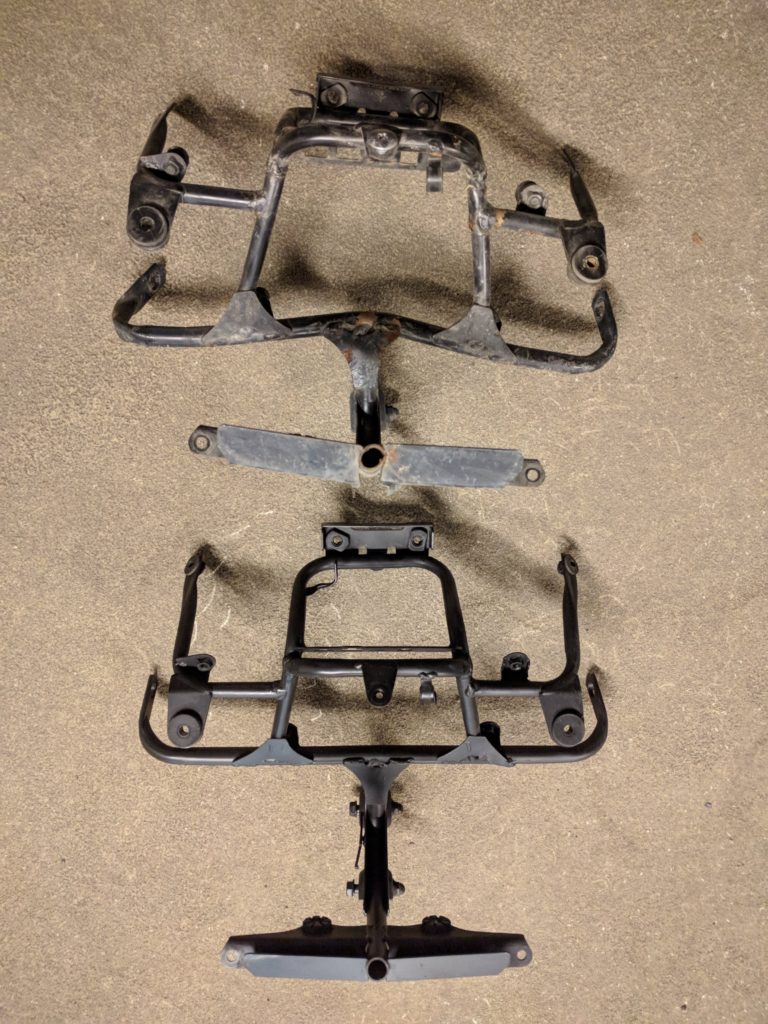
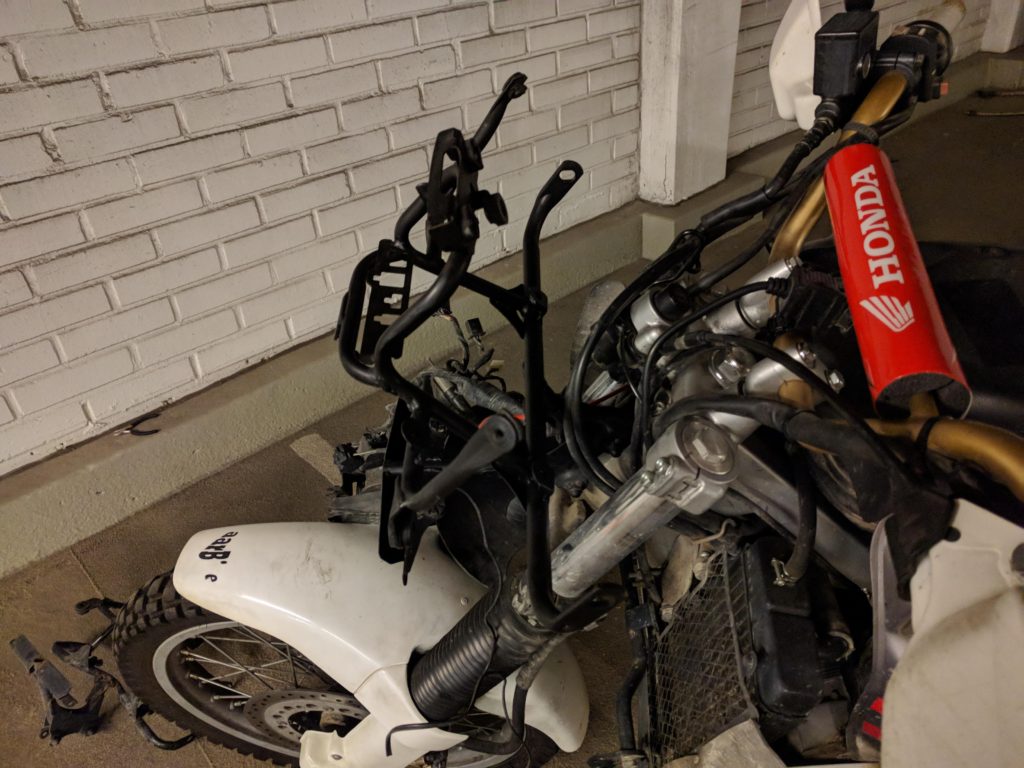
Of course, replacing the bracket means disassembling the front fairing, lights and dashboard. That’s why the repair wasn’t cheap. You can see the motorbike with just the bracket in the picture below. Somehow the “new” bracket wasn’t aligned straight, but I managed to bend it with my arms. Other than that, it was like new and for the price I’m very happy with the purchase.
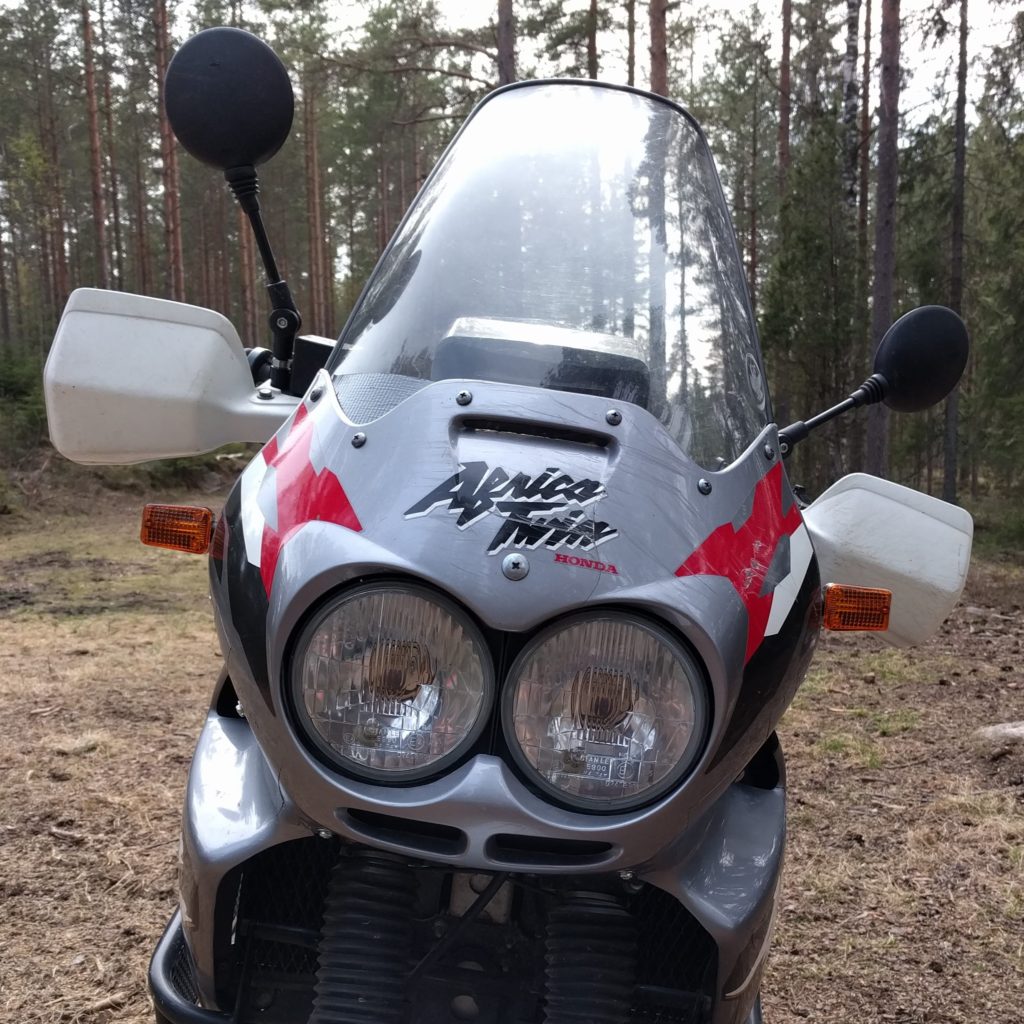
The bracket got twisted because the indicator hit the ground. I think the factory indicators are too long and exposed, so I decided to prevent this happening again by installing shorter ones. But I wanted some that looked like the original, it took me a while to find the ones in the picture below in eBay. Unfortunately they didn’t have any brand in the package and I wasn’t very happy with the seller that sold them, so I’m not going to give you any link. Nevertheless, I think they are not difficult to find. The only concern that I have is that the arm is hard plastic; but if it breaks before messing the bracket again, I will be happy. The rear indicators are protected by the pannier holders.
The indicators came with way too short cables, I had to solder new ones. These motorcycle uses Japanese bullet connectors that you won’t find in the usual shop of electronic components. After asking around someone pointed me to this shop.
The grip heaters that I had was a poorly installed DIY kit that actually got a loose cable and stopped working at the end of last season. I wasn’t happy with it because it had a two-positions switch that made it difficult to set the right temperature. So instead of fixing it, I decided to replace it. I was recommended Oxford Premium Adventure. Heated grips are all installed the same way, it wasn’t difficult. The grips are long to fit all motorcycles, you are supposed to cut them to the proper length. The cable to the battery is also too long, but I’m not cutting it this season in case I have to use the warranty.
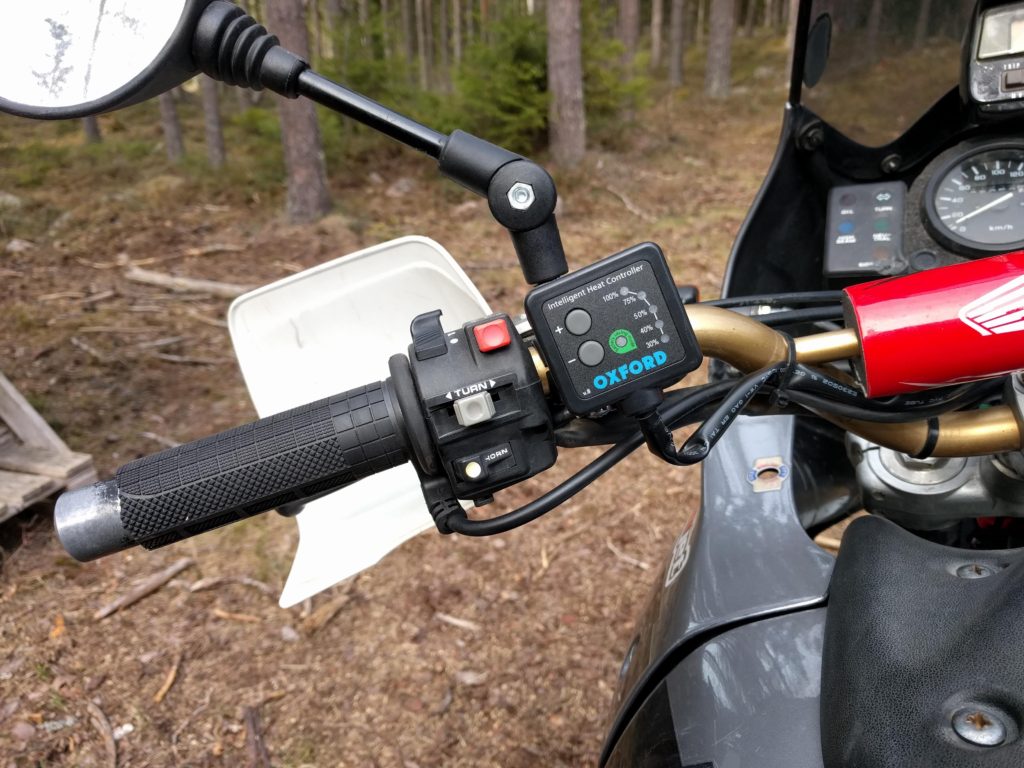
I mentioned that I connected the USB socket directly to the battery and it was always giving power, even with the keys off. And my assumption was wrong, that drains the battery even when nothing is connected, because there is an active circuit converting from 12V to 5V. Fortunately the old heated grips were connected to the key lock, so I used that cable to feed the socket and now it’s off when the keys are off. I don’t know and I can’t show how the cable is connected inside the lock, but it works. I plan to eventually connect the heated grips to the same cable, it’s thick enough and it has a fuse. In any case, connecting these grips directly to the battery is safe because they detect and switch off when the engine is not running.
The picture below shows how the new cables look like. The gray tape in the indicators is meant to cover the hole and prevent water from getting in. The roll of cable is the extra cable of the Oxford heater. Like I said, I will cut it next winter. I covered the connections with gray tape.
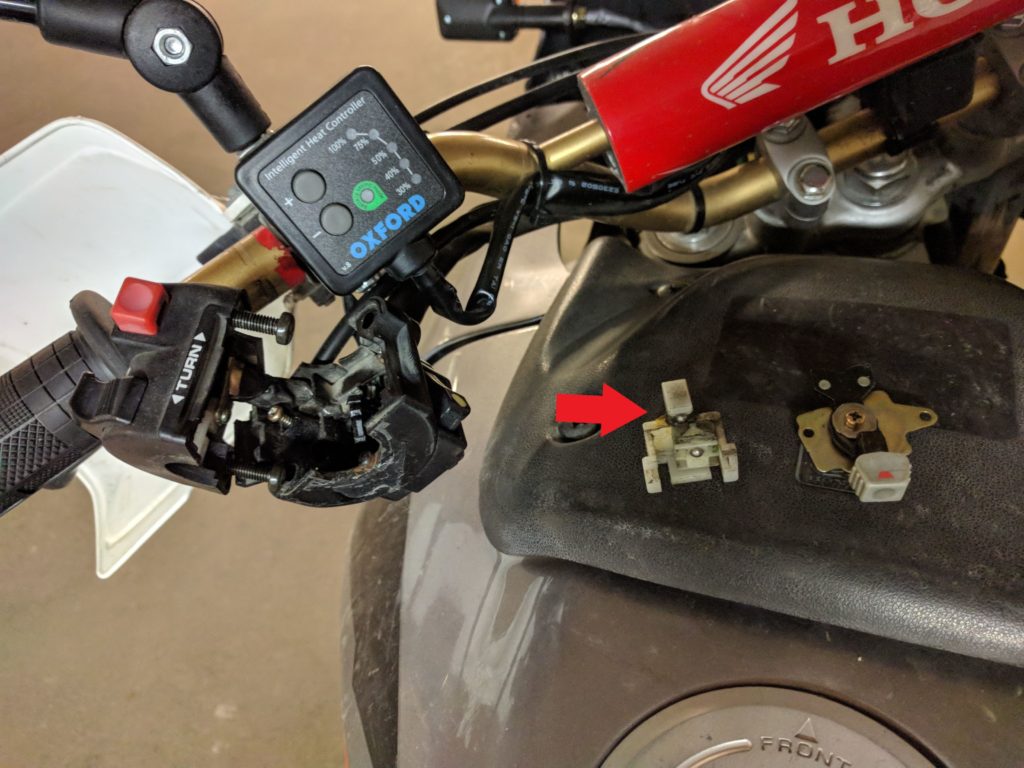
I already had my first ride of the season and tested everything. To my dismay, the indicators sometimes didn’t work. At first I thought I had a loose connection. I noticed that I didn’t fix the bullet connectors to the cables strongly enough, they accidentally came off a couple of times. I have to redo this, but I was hoping they would resist until next winter. However, I told a friend about this and he suggested another cause. He told me he had the same problem and it was because dirt inside the handlebar switch prevented it from working correctly. And indeed, I noticed that when they didn’t work I didn’t get the same “clicky” feeling when pushing the lever. It felt the same as when you have the indicator on and you push the lever in the same direction again.
My friend suggested me to disassemble the switch following this guide. I don’t understand German and the pictures don’t show the most important part: clean the ball and spring inside the white plastic piece, where the red arrow points. It’s easy to take them out and put them back in, just be careful not to loose them. Don’t miss the opportunity to clean everything else the best you can.
Unfortunately the indicators were not the biggest setback that I had in that first ride. Somewhere in a forest I stopped the bike and then I couldn’t start it again, the battery died. I called the tow service and they gave me a waiting time of two hours, it was an important holiday in Finland. Luckily I was in a place where some friends could come and connect his car’s battery to mine, so I could start the motorbike.
I thought the issue was in the battery, so I bought a new one. By recommendation, I chose an AGM battery. So I put the acid in it, charged it, fitted it in the bike and nothing, no electricity. And that’s when I learned an important lesson: batteries of the same size and capacity can have the polarity the other way around. I got another battery with the right polarity, but still no electricity. I found out that that my mistake burnt the main fuse, located in the left side of the bike. That’s when the Haynes manual came to the rescue. Now I know where the fuses are, including the spare ones.
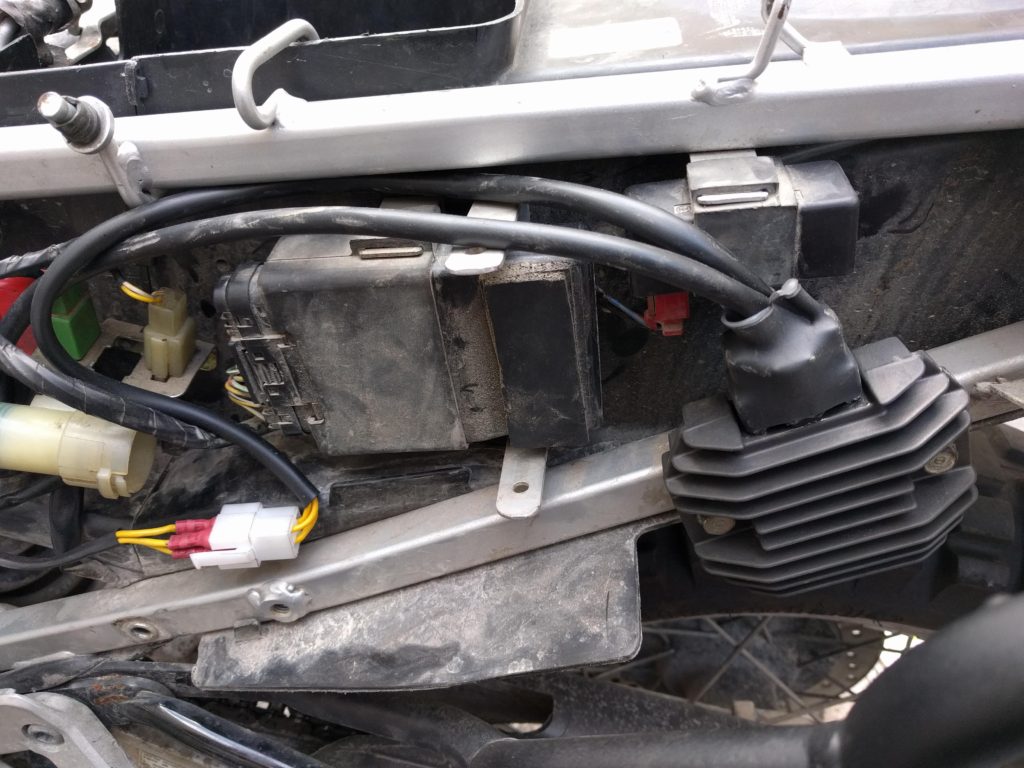
After that I had a happy day of riding 300 km with a friend; but two days later, throttling from a stop, the battery died again. That’s when I gave up and sent the bike to the repair shop. They told me that the stator of the alternator needed replacement, and I asked them to fit a ESG140 stator which is supposed to be better than OEM. Later they noticed the regulator overheated and I ordered a Motek regulator/rectifier for them to fit. This regulator has a cable that is connected directly to the battery terminals, by-passing the round connector that usually overheats and burns. This is how it looks installed:
Because all these problems I could only ride the bike a couple of days until the middle of July. The overheating regulator is a known problem of the Africa Twin, I hope the new regulator solves it. Whether the dirt in the indicator switch is an issue or just maintenance is arguable, my guess is that it has never been cleaned in 23 year of age of the bike. I have learnt many things, which was the whole point of trying to do things myself. Next winter I need to fix a sticky throttle and I will try to change the transmission kit and the tires, at least.